The Traditional Japanese-style Woodblock Printing Process
Step-by-step
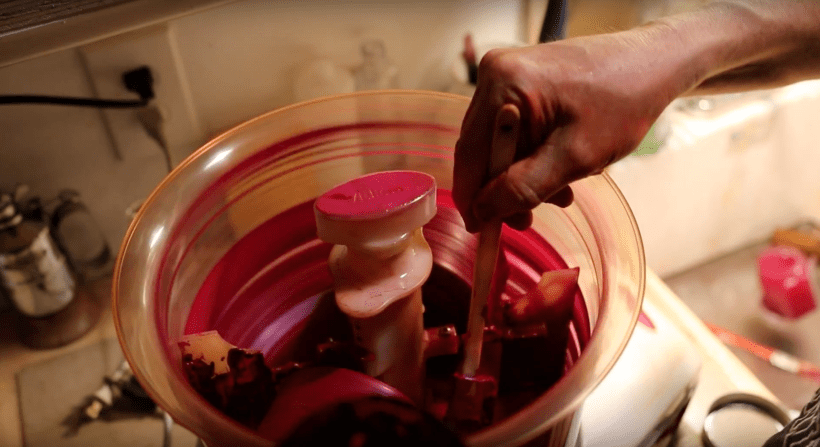
(1) 0:00>0:17- Applying ink and paste the the carved woodblock
(2) 0:18>0:23-Positioning the paper in registration marks (kento)
(3) 0:27>0:45- Using a baren to apply pressure to make the impression.
Repeat this process 32,000 times for the Appalachian Trail Series!
It Starts With Preparations

< There are many preparations that need to be made for woodblock printing (moku hanga)- here printing brushes (maru bake) are being softened using a shark skin in the traditional manner.
> A variety of natural dry pigments are mulled with water to make environmentally-friendly inks. Home-made pure pigment inks results in the most saturated colors.

< Starch paste is prepared. Paste (nori) is used in varying degrees along with the ink as a way to keep pigment particles in suspension resulting in smooth printing.

> Recovering the hand-made printing pads (baren) with new bamboo skins.

< A variety of woodblock carving tools need to be sharpened on a waterstone.
Drawing+Design

< An initial drawing/design is created (in this case for the Appalachian Trail Series design “Vermont”) using a dry erase board which allows for easy drawing and erasing.

> A photo of the drawing is then taken, flipped horizontally, and printed out. The image is inked by hand and scanned.

< Color separations are created using the computer. This process helps to decide which colors are to be used and how many blocks are to be carved.
Preparation of Woodblocks

> One quarter-inch thick cherry wood facing is laminated onto blocks using waterproof glue. It requires on the average 11 blocks per design.

< The laminated cherry blocks are planed, then sanded four times using a variety of grits, next they are wet-sanded to raise the wood grain, dry-sanded, then buffed smooth.

> Each block is carved using both hand and mechanical processes. Most prints average 20 colors each- one block can be used for more than one color.
Printing Prep

< Sized (coated with dosa, or glue) hand-made mulberry paper (washi) from Japan is cut to size along the paper grain.

> The paper is brushed with water and kept damp during the printing process- this allows the pigment to be better absorbed by the paper.
< Print like crazy and then dry the prints.
Binding (for print series)

> Hand-made paper and fabric are combined to serve as a protection. The bound presentation case allows the 8″ x 10″ prints to be easily removed for display and framed in standard-sized frames.